


Putting solar panels on your roof can bring down your monthly electricity bill, shield you from future tariff hikes, and make your home less dependent on the grid. A rooftop solar system turns sunlight into electricity that powers everyday appliances like fans, lights, TVs, fridges, washing machines, air conditioners, and water pumps.
For most households, an on-grid rooftop solar system works best. It stays connected to the electricity grid and runs on net metering, which means any extra power you generate during the day gets sent to the grid and adjusted against the electricity you use later. In Maharashtra, MSEDCL permits rooftop solar systems below 1 MW under its net metering process.
This guide walks you through system types, the right capacity for your home, costs, subsidy, installation steps, required documents, maintenance, and the mistakes worth avoiding.
Understand the three system types
Before you start comparing prices, it helps to know which type of solar system actually suits your home.
| System type | How it works | Best for | Main limitation |
|---|---|---|---|
| On-grid solar | Connected to the electricity grid; extra units go to the grid through net metering. | City homes with regular electricity supply | It usually turns off during a power cut for safety. |
| Off-grid solar | Uses batteries to store solar power | Remote places with poor or no grid access | Batteries raise the cost and need replacement. |
| Hybrid solar | Uses both grid connection and battery backup | Homes needing bill savings plus backup | More expensive than on-grid |
On-grid solar
This is the go-to choice for urban homes across India. The setup includes solar panels, an inverter, a mounting structure, cables, safety equipment, and a bi-directional net meter.
During the day, the panels generate electricity, and your home uses it first. Whatever is left over flows into the grid. At night or when sunlight is low, your home simply draws power from the grid as usual.
For a typical household in Pune or elsewhere in Maharashtra, on-grid solar tends to be the most affordable route since it skips the cost of batteries.
Off-grid solar
An off-grid setup stores solar electricity in batteries, letting you run select appliances during power cuts or in places with no grid access at all.
That said, batteries push up the overall cost, and they wear out over time, so you may need to replace them after a few years. Go for this option only if having backup power matters more to you than keeping costs low.
Hybrid solar
A hybrid system brings together solar panels, battery storage, and a grid connection. It can lower your bills while still giving you backup power for certain appliances. This makes it a good fit for larger homes, villas, or areas where power cuts are common.
Don’t assume solar panels alone will keep your whole house running during a blackout. A standard on-grid system shuts off automatically during a grid outage, mainly for the safety of electricity workers. You’d need a hybrid inverter along with batteries to get real backup.
Choose the right solar size
Solar capacity is measured in kilowatts, or kW for short. The right size for your home depends mostly on how much electricity you use each month, how much roof space you have, and how much power you need during daytime.
A good starting point is to look at your last 6 to 12 electricity bills and work out your average monthly consumption. One unit of electricity equals one kilowatt-hour.
As a rough guide from government sources, monthly consumption roughly maps to solar capacity as follows:
- Up to 150 units a month: around 1 to 2 kW.
- 150 to 300 units a month: around 2 to 3 kW.
- Above 300 units a month: 3 kW or more may work better.
Across much of India, a 1 kW rooftop system tends to generate roughly 100 to 130 units of electricity a month, though this shifts based on sunshine, the season, which way the panels face, shading, how clean they are and local weather patterns. Treat this as a ballpark figure rather than a promise.
Typical home examples
- 1 kW system: A small home running lights, fans, a TV, a fridge, a Wi-Fi router, and not much else.
- 2 kW system: A small to medium family using standard appliances, with monthly consumption around 150 to 250 units.
- 3 kW system: A family with higher usage, possibly including a washing machine, a water pump, a fridge, and occasional AC use.
- 5 kW system: A larger home running multiple ACs and more appliances, with heavier daytime electricity demand.
Don’t pick a system size purely because a subsidy is available for it. A system that’s too small won’t cut your bill by much, and one that’s too large could take longer to pay for itself, especially if your DISCOM caps how much you can export or install.
Check your roof before buying
Your roof matters just as much as the panels themselves. A qualified installer should carry out a site survey before you pay any advance.
Roof space
Generally, a rooftop solar system needs about 80 to 100 square feet of shadow-free roof space per kW, depending on the panel wattage, layout, walking space, and tilt structure.
As a rough guide:
- 1 kW needs around 80 to 100 square feet.
- 3 kW needs around 240 to 300 square feet.
- 5 kW needs around 400 to 500 square feet.
Roof direction and shade
Solar panels perform best with steady sunlight through most of the day. In India, they’re usually installed facing south, though east-west layouts can also work well depending on the roof shape or how you use electricity through the day.
Try to keep panels clear of shade from:
- Nearby buildings.
- Water tanks.
- Trees.
- Mobile towers.
- Chimneys.
- Parapet walls.
- Lift rooms.
Even a little shade on one panel can drag down output across a chunk of the system. Ask your vendor to walk you through the proposed panel layout and point out any shading risks.
Roof strength and waterproofing
The roof needs to be sturdy enough to support the panels and the mounting structure. If it already has leakage issues, weak concrete, broken tiles, or waterproofing problems, get those fixed before installation begins.
Ask your installer whether drilling is needed and how they plan to seal the holes to stop future leaks. On terraces especially, good mounting design and waterproofing make a real difference.
If you live in an apartment, you’ll typically need permission from the housing society along with clarity on who owns the roof. A shared terrace usually needs a society-level decision rather than one resident going ahead on their own.
Solar panel system components
A proper rooftop solar quotation should spell out every component clearly. Steer clear of vendors who only give you a flat “per kW” price with no specifications attached.
Solar panels
Panels capture sunlight and turn it into DC electricity. Most residential systems today use mono-crystalline panels because they offer good efficiency and take up less roof space than older panel types.
Things to check:
- Manufacturer and model number.
- Panel wattage.
- Product warranty.
- Performance warranty.
- Certification and approved-list status, where applicable.
- Serial numbers on the panels matching the invoice.
Solar inverter
The inverter converts DC electricity from the panels into the AC electricity your appliances actually use. It’s one of the most critical parts of the whole system.
Ask your vendor about:
- Brand and capacity.
- Whether it’s on-grid, hybrid, or off-grid.
- Warranty period.
- Monitoring app or web portal.
- Service centre availability nearby.
- Protection against voltage fluctuations and overheating.
Mounting structure
The mounting structure holds the panels at the correct angle. It should resist rust and be built to handle wind load. Installation quality here matters more than simply going for the cheapest structure on offer.
Electrical protection equipment
Your system needs proper cables, earthing, DC and AC distribution boxes, surge protection devices, isolators and breakers. These parts protect the system from electrical faults, lightning-related surges, and other risks.
Never settle for a system that cuts corners by skipping safety equipment.
Net meter
A net meter, sometimes called a bi-directional meter, tracks both the electricity you import from the grid and the electricity your solar system exports. It sits at the centre of on-grid solar billing. Official guidance confirms that this meter arrangement records both import and export energy.
Solar panel price in India
Prices vary depending on the city, vendor, panel brand, system size, roof type, inverter choice, installation complexity, and whether taxes, net meter charges, and safety equipment are already factored in.
As a broad market estimate, here’s what an on-grid residential system might cost:
| System size | Approximate price before subsidy |
|---|---|
| 1 kW | Rs 65,000 to Rs 85,000 |
| 2 kW | Rs 1.25 lakh to Rs 1.60 lakh |
| 3 kW | Rs 1.80 lakh to Rs 2.40 lakh |
| 5 kW | Rs 2.80 lakh to Rs 4.00 lakh |
| 10 kW | Rs 5.00 lakh to Rs 7.00 lakh |
These numbers are meant for planning purposes only, not fixed government rates. It’s worth getting at least three detailed quotations and comparing equipment specs side by side.
Larger systems often work out cheaper per kW since costs like site visits, transport, design, and paperwork get spread across the full installation.
Extra costs to ask about
Before you sign anything, confirm whether the quoted price actually covers:
- Solar panels and inverter.
- Mounting structure.
- DC and AC cables.
- Earthing and lightning protection.
- Distribution boxes and breakers.
- Installation labour.
- Roof waterproofing treatment, if needed.
- Net metering application support.
- Meter and inspection charges.
- Monitoring app setup.
- GST.
- Transport.
- Service visits after installation.
A low quote can often leave out several of these items. Ask for a final, all-inclusive figure in writing before you commit.
Government subsidy: PM Surya Ghar
The PM Surya Ghar: Muft Bijli Yojana offers central government support for eligible residential rooftop solar installations. The standard subsidy works out to Rs 30,000 per kW for the first 2 kW and Rs 18,000 for the third kW, capped at a maximum central subsidy of Rs 78,000 for systems of 3 kW or above.
| Solar capacity | Maximum central subsidy |
|---|---|
| 1 kW | Rs 30,000 |
| 2 kW | Rs 60,000 |
| 3 kW or above | Rs 78,000 |
For example, if a 3 kW on-grid solar system costs Rs 2.10 lakh and you receive the full Rs 78,000 subsidy, your effective equipment cost drops to about Rs 1.32 lakh before factoring in any local charges or state-level support.
This subsidy applies to eligible residential consumers and isn’t simply a discount any seller can hand out. Stick to the official portal process and work only with a registered vendor after your feasibility approval comes through.
Don’t pay a vendor who promises a “guaranteed subsidy” without walking you through the official application process. Always verify subsidy amounts, rules, paperwork, and the list of eligible vendors on the official PM Surya Ghar portal and your local DISCOM portal.
Application and installation process
This official process exists to make sure your system is legal, safe, and eligible for subsidy.
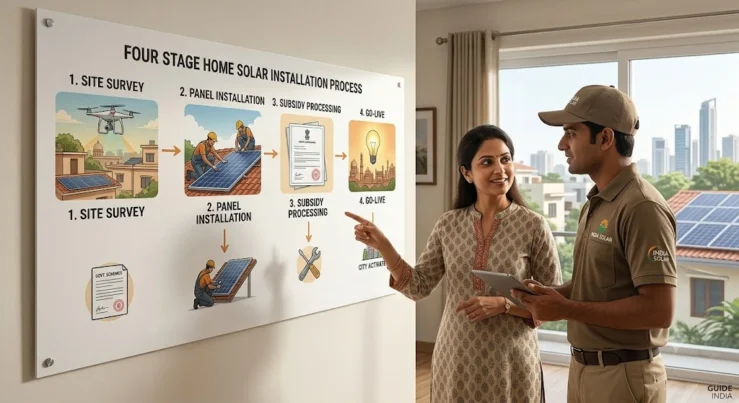
- Register on the PM Surya Ghar portal. Pick your state and electricity distribution company, then enter your consumer number, mobile number, and email.
- Submit the rooftop application. Provide details of your property, electricity connection, and the solar system you’re proposing.
- Wait for technical feasibility approval. Your DISCOM checks whether your grid connection and proposed system size will work.
- Choose a registered vendor. Once approved, pick a vendor registered with your DISCOM or listed on the official system. MSEDCL’s process also routes consumers to select an empanelled vendor through its portal.
- Complete the site survey and sign the agreement. Make sure the quotation lists equipment models, warranty terms, the final price, the installation timeline, and who’s responsible for approvals.
- Install the solar system. The vendor sets up the panels, inverter, structure, wiring, earthing, and protection equipment.
- Upload installation details and apply for net metering. The official portal asks consumers to submit plant details and apply for the net meter once installation is done.
- Inspection and commissioning. The DISCOM inspects the installation and either installs or approves the net meter. Once inspection and net meter installation are done, a commissioning certificate gets generated.
- Submit bank details. Upload your bank account details along with a cancelled cheque, as required.
- Receive subsidy. Once everything is complete, the subsidy gets transferred to your eligible bank account. According to the portal, payment goes out within 30 days of submitting the commissioning report and bank details.
Hold on to your application ID, approval letter, invoice, warranty documents, photographs, commissioning certificate, and payment receipts.
Documents you may need
Exact requirements can differ by DISCOM, but it helps to have these ready:
- Latest electricity bill.
- Consumer number or account number.
- Aadhaar card or another identity document.
- Mobile number linked to the application.
- Bank account details.
- Cancelled cheque.
- Proof of property ownership or occupancy, if asked.
- Society permission for apartments or shared roofs.
- Vendor invoice and installation documents.
- Photographs of installed panels, inverter, and meter, if required.
Savings and payback period
How much you save depends on how much solar electricity you actually use, your electricity tariff, export adjustment rules, and how output shifts across seasons.
Here’s a simple example. Say a 3 kW system produces around 360 units a month on average, and each unit saved is worth about Rs 7. That works out to roughly Rs 2,520 in monthly savings.
[
360 \times 7 = 2,520
]
Over a year, that adds up to:
[
2,520 \times 12 = 30,240
]
If your final cost after subsidy comes to around Rs 1.35 lakh, a simple payback calculation looks like this:
[
135,000 \div 30,240 \approx 4.5
]
So under these assumptions, you could recover your investment in roughly four to six years. Actual numbers may come in higher or lower depending on your situation.
Solar panels typically keep generating electricity for 25 years or more, though output gradually declines over time. You might need to replace the inverter before the panels themselves, depending on warranty terms and usage patterns.
Also Read: How to Dress for Situations That Aren’t Quite an Interview, But Feel Like One
Maintenance and safety
Solar systems don’t demand heavy upkeep, but they shouldn’t be ignored either.
- Clean the panels whenever dust, bird droppings, leaves, or pollution start cutting into sunlight exposure.
- Use soft water, a soft cloth, or a suitable cleaning tool.
- Skip harsh chemicals and abrasive brushes, and don’t step on the panels.
- Clean early morning or evening when the panels are cooler.
- Check the inverter app once a month for generation data and fault alerts.
- Inspect cables, mounting bolts, and earthing, and check for water leakage from time to time.
- Call in a professional if output suddenly drops.
- Keep trees trimmed so new shade doesn’t creep onto the panels.
Avoid spraying cold water on panels that are very hot from the afternoon sun. And never touch open electrical connections or attempt to fix inverter wiring on your own.
Common mistakes to avoid
- Installing before getting DISCOM feasibility approval.
- Picking a vendor purely based on the lowest quote.
- Ignoring shade from tanks, trees, and nearby buildings.
- Going for a system larger than your approved or actual useful capacity.
- Skipping checks on panel and inverter warranties.
- Forgetting to confirm whether GST, net meter work, earthing, and safety devices are included.
- Paying the full amount before installation milestones are actually completed.
- Believing unrealistic promises like “zero electricity bill forever.”
- Skipping proper waterproofing on a terrace installation.
- Not keeping invoices, commissioning papers, and warranty documents safe.
A good solar system is more than just panels sitting on a roof. It’s a correctly sized, safe, approved, and properly documented power setup that should keep delivering savings for years to come. What is your average monthly electricity consumption in units, and what type of roof do you have?